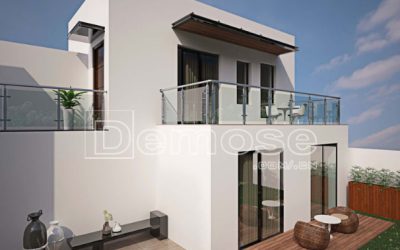
This document provides comprehensive technical specifications and step-by-step installation instructions for guardrail systems. It outlines the fundamental safety requirements, including height, load capacity, and material specifications for both indoor and outdoor applications in public and residential buildings. The guide details two primary installation methods: one for glass railings and another for metal bar or cable railings. Each method is broken down into a clear, sequential process, from initial measurement and preparation to final inspection and site handover. This revised version features corrected grammar, standardized technical terminology, and precise phrasing, ensuring clarity and professionalism for contractors, engineers, and construction managers. It serves as an essential reference for ensuring that guardrail installations are safe, compliant, and executed to the highest standard.
I. Basic Requirements for Guardrail
- For indoor public stair handrails, the height from the step nosing to the top of the handrail should not be less than 900mm. If the level length of the stair flight exceeds 500mm, the handrail height should not be less than 1000mm.
- If the width of the stair well is more than 200mm, a checkered guardrail should not be used. Additionally, the gap between vertical balusters must not exceed 110mm.
- For outdoor public guardrails, the height should not be lower than 1050mm. For mid-to-high rise residential buildings, the railing height should not be lower than 1100mm.
- The transitions of the guardrail and handrail, whether between different levels or planes, must be continuous and smooth.
- The horizontal load-bearing capacity of the top of the guardrail must be not less than 1.0 kN/m.
- To enhance safety, please use safety glass that complies with staircase railing standards.
II. Installation Technology and Process for Guardrail
Before installing the balusters, measurements should be taken on each floor according to the staircase. The positions of the balusters should then be determined based on the staircase steps.
1. Installation Method for Glass Railing

Step 1
Determine the locations for the staircase starting point and the landing guardrail. Then, set alignment strings and drill holes. For guardrail mounting, consider the following two conditions:
- Condition A: Mounting on the finished floor panel.
- Condition B: Mounting on the structural floor panel.
In Condition A, determine the location based on measurements, set strings, and drill holes. In Condition B, set strings and drill holes according to the shop drawing dimensions, set pre-embedded parts, weld them, and prepare for the following steps.
Step 2
Install the guardrail posts: First, install the posts at both ends of the landing. Tie a string in a straight line beneath the handrail position, then install the remaining posts.
- In Condition A, use expansion bolts to fasten the base plate of the guardrail post.
- In Condition B, weld the base plate to the pre-embedded part. Welding materials with a conforming certificate should be used.
After installation, check whether the guardrail posts are straight, level, and secure. Adjust if necessary to ensure the smooth installation of the glass panels.
Step 3
Install the glass panels: Follow the instructions in the shop drawing. Fix each glass panel to its fitting in sequence, applying adhesive to the screws before fastening to prevent loosening.
Step 4
Install the handrail: Fix the handrail to the top of the posts with screws or by welding. For easier installation, we suggest using tapping screws for wooden handrails and using bolts or argon arc welding for metal handrails.
Step 5
Inspection after installation: Ensure that all screws for fixing the glass and the posts are tightened. Also, make sure that no necessary gaskets are missing.
Step 6
Clean-up after installation: Wipe the surfaces of the glass, handrail, posts, etc., with a wet towel to remove dust and debris. Then, wipe them again with a dry towel to ensure the product surface is clean, bright, and free of water stains and debris. Finally, cordon off the installed guardrail with removable barriers and post a notice stating: “Installation Complete, Pending Inspection.”
2. Installation Method for Metal Bar or Cable Railing

Step 1: Same as Step 1 of the glass railing installation.
Step 2: Same as Step 2 of the glass railing installation.
Step 3: Install metal bar or cable. Secure the bar or cable through the fittings on the posts according to the shop drawings. Tighten both ends using the appropriate terminals, but ensure they are not overtightened to avoid deforming or overstressing the cable/bar.
Step 4: Same as Step 4 of the glass railing installation.
Step 5: Same as Step 5 of the glass railing installation.
Step 6: Same as Step 6 of the glass railing installation.
Finally, cordon off the installed guardrail with removable barriers and post a notice stating: “Installation Complete, Pending Inspection.”
Recent Posts
-
 Loft Stairs: Design Ideas, Styles, and Material Guide
 -
 Indoor Steel Structure Stairs: The Fusion of Strength and Style
 -
 Framed Glass Railing: A Guide to Style, Safety, and Durability
 -
 Curved Glass Staircase: The Pinnacle of Modern Architectural Design
 -
 Finding the Right Custom Stair Companies for Your Project